Flow Features
As a Salesforce Consultant, I always look forward to exploring the latest enhancements in each release (especially the Flow section). Even the smallest enhancements can be a big improvement in automation efficiency. In the Spring ‘25 release, Salesforce introduces several new features that enhance usability, performance, and user experience. Let’s take a look at what’s new and how these features can make designing and managing flows even smoother.
Depending on your instance of Salesforce, you can expect to see these changes in your production org on the weekends of January 11, February 8, or February 14. You can find out your specific release window by searching for your instance at Salesforce Trust.
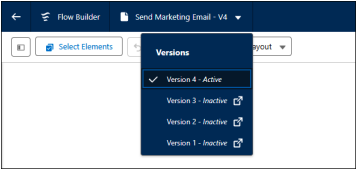
Access Flow Versions in Flow Builder
First up is a simple feature I didn’t even realize I needed. While working on a flow, I can now open another version without navigating through multiple screens. Directly within the Flow Builder interface, I am able to select the desired version from the navigation header, and the other version will open in a new tab or window – a welcome timesaver!
Keyboard Shortcuts
If you love using keyboard shortcuts, you may have felt the frustration of not being able to press Ctrl+Z to quickly undo that misplaced Get Records element inside a loop. With Spring ’25, Salesforce is freeing admins from the hassle of relying solely on a mouse or trackpad—keyboard shortcuts for undo, redo, and save are now available directly in the Flow Builder canvas!
Command | Shortcut |
Undo | Windows: Ctrl+Z macOS: Cmd+Z |
Redo | Windows: Ctrl+Y macOS: Cmd+Y |
Save As | Windows: Shift+Ctrl+S macOS: Shift+Cmd+S |
Note: These keyboard shortcuts are not supported in element window pop-ups
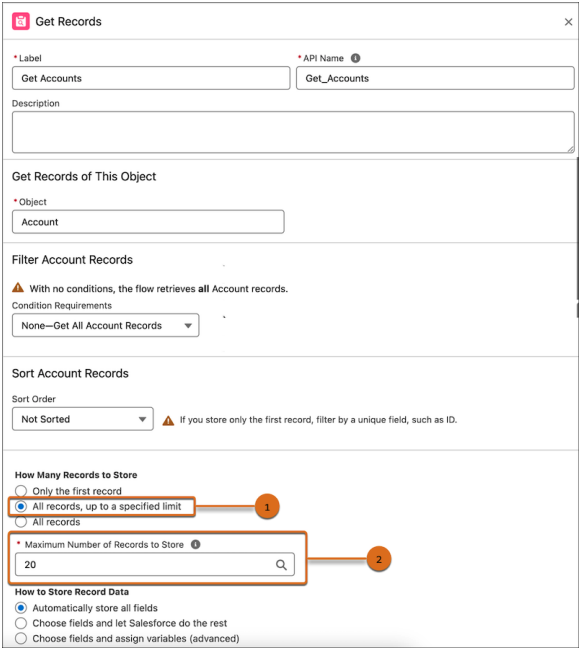
Control the Number of Records Retrieved with Get Records
Working with large datasets can sometimes cause performance issues or hit governor limits when using the Get Records element set to retrieve all records. Salesforce has added the option to set an upper limit to the number of records retrieved. This can improve flow performance and reduce the risk of timeouts and errors.
You will see this additional option in the Get Records element where the “How Many Records to Store” section is. Select: “All records, up to a specified limit”, then enter the maximum number of records to store anywhere from 2 to 20,000.
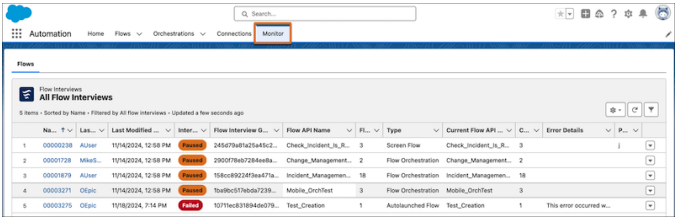
Monitor Failed / Paused Flow Interviews from the Automation Lightning App
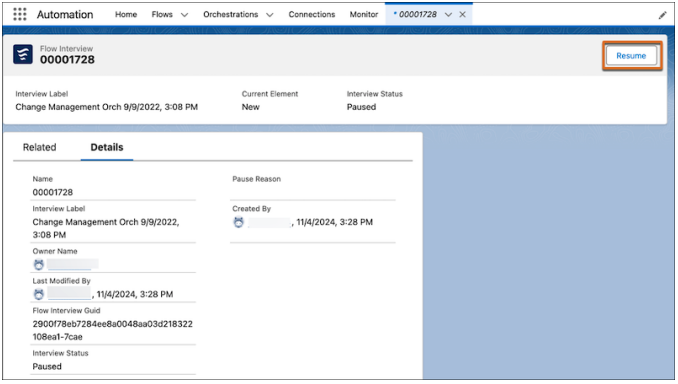
Salesforce first introduced the Automation Lightning App in Summer ‘24 as an alternative way for admins to organize and access their flows. Admins can access their flows through the Setup Menu or can use this new, frontend interface which could be further customized with tabs, list views, and dashboards similar to other Lightning Apps, like the Sales app. With this release, Salesforce has added the ability to see all failed or paused flows from it. This list view and interview record view is much more user friendly than reviewing it from setup.
Navigate to the Automation app, and select the new “Monitor” tab. Click on the record to review the details.
To debug click on the Open button in the top right corner of the record page.
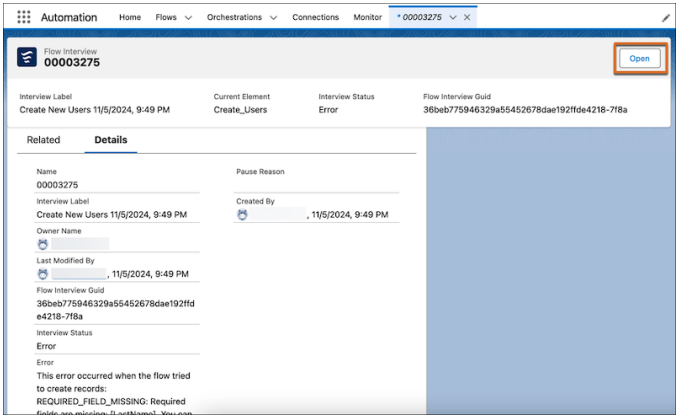
Similarly, to resume a paused flow, click on the Resume button in the top right corner of the record page.
Currently, you cannot create custom list views, which may limit flexibility when working with the monitor (you still can do it in setup). However, you can modify the filters of the default list view that Salesforce provides. Just be mindful that you are sharing the same list view with other admins in your org, and since the list view label, “All Flow Interviews”, doesn’t appear to be editable (as of during the preview), it could be misleading to others if your modified filters only a return a subset of records.
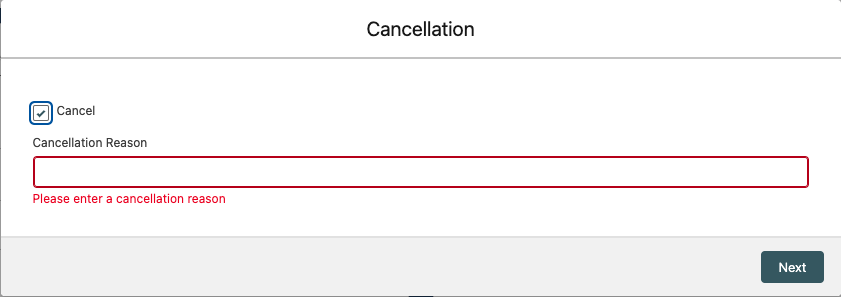
Immediate Feedback from Screen Components with Invalid Values
In screen flows, user input can be validated with a formula and providing a custom error message. Prior to this release, if a user entered invalid data, the validation error messages wouldn’t appear until they attempted to move to the next screen or finish the flow. Now if a user enters a value, the component will validate the input as soon as they click another screen component. This makes for a better user experience, providing immediate feedback as they’re filling out fields rather than disrupting their workflow by only displaying warnings once they finish a screen.
Add Built-In Visual Progress Bars to Screen Flows
Progress bars are another UX/UI improvement to screen flows introduced in this release. You can now add a built-in progress indicator to visually guide your users through stages of a screen flow.
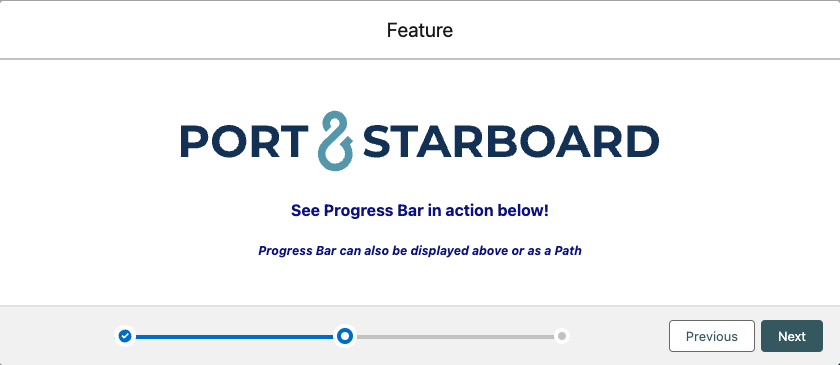
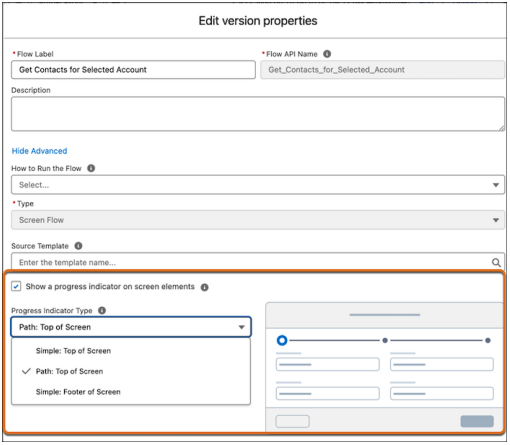
Flows created after the Spring ‘25 release will have this feature enabled by default. To turn it on in a screen flow created prior to this release, edit the version properties and show advanced. Check “Show a progress indicator on screen elements” and choose an indicator type. The options include a simple style (as shown above) or a path style. The path style can only be displayed at the top of the screen.
Summary
The Salesforce Spring ‘25 Release introduces several enhancements to Flow Builder, making it more powerful and user-friendly. From accessing flow versions directly within the builder to improving user input validation in screen flows, these updates streamline processes for admins and consultants alike. With features like visual progress indicators and enhanced monitoring via the Automation app, Salesforce continues to empower its users with tools to deliver effective solutions. Explore these updates to maximize your Salesforce flow efficiency today!
As you navigate these important updates and prepare your organization for upcoming changes, remember that Port & Starboard is here to help. Whether you need assistance with implementing new features, understanding the impact of release updates, or simply want to strategize for the future, our team is ready to support you. Contact us today!