If you’re looking for a form-to-lead Salesforce solution using WordPress, there are a few options out there, but not all are created equal. So how do you choose which solution is best? Instead of spending hours of research, we’ve narrowed down the possible options and what we think works best based on our experience:
Option 1: Using Native HTML Forms
Using the out-of-the-box web-to-lead solution may seem like a good idea (or maybe it seems like a good idea because it’s free), but 99% of the time it’s not going to do everything you need it to do. It may be free, but it’s extremely limited and not interactive at all. This is the last option we would use.
Option 2: Using the free Katz WordPress Plugin with Gravity Forms
This is definitely a step-up to the native HTML form, as it uses Gravity Forms, but doesn’t offer as much functionality as we’d like to see. The webform will bring information into Salesforce, but then that’s it. Information can’t be sent back and forth or be updated if the form is changed on the web side of things. It also isn’t able to go to multiple objects. While it does work, it hasn’t been updated in years and we don’t expect any additional updates to happen.
Option 3: CRM Perks Salesforce Plugin with Gravity Forms
Of all the options we’ve tried out, this plugin by-far outperforms! You have full control over what is sent, and connects safely and securely through Oauth 2.0. You can map any of your fields to literally any Salesforce Object fields, use pick lists, create multiple feeds and conditions for sending entries to Salesforce, and error reporting. It’s also fully synchronized, so if you update, delete, or restore an entry, that entry will be updated, deleted, or restored in Salesforce too. Other fun features include filtering entries and creating rules for entries sent to Salesforce, sending fields as a Salesforce entry note, and refreshing pick lists automatically after a certain period of time.
Sound like the right solution for you? Here’s an example on how we use the CRM Perks Salesforce Plugin and Gravity Forms to send job applications into our internal Salesforce org:
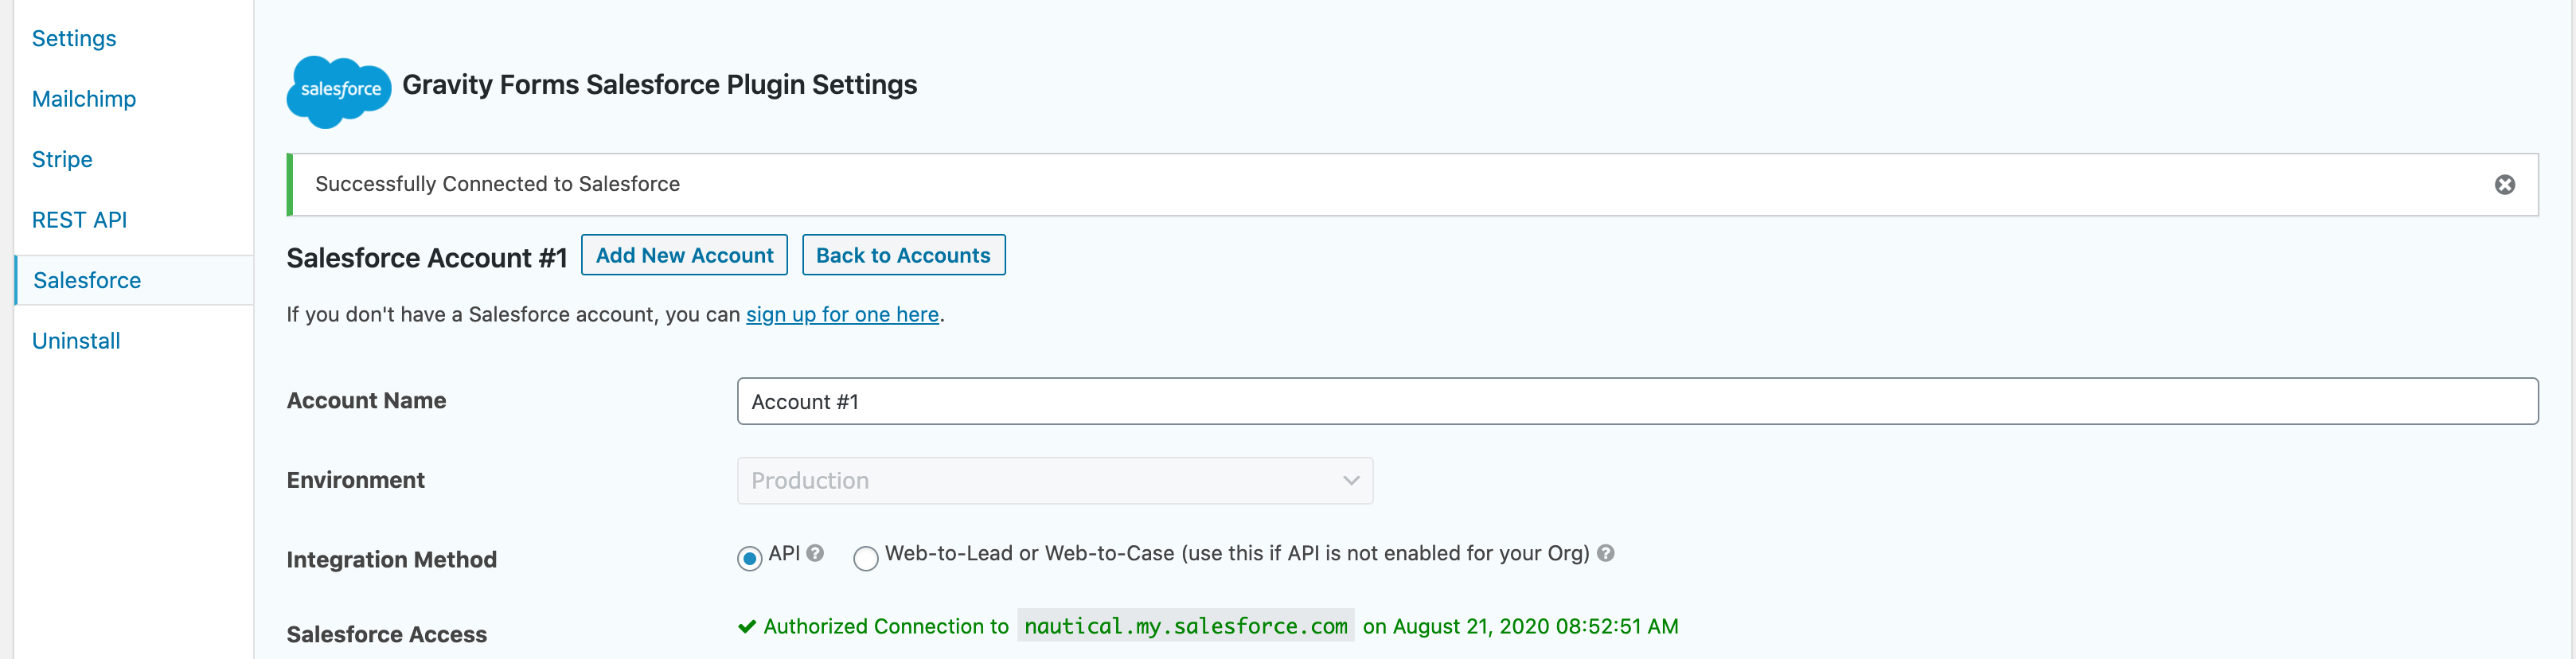
Step 1: Connect to your Salesforce org
You will need Gravity Forms to use this plugin, so make sure you have that set-up first.
Once you’re all set with Gravity Forms, you’ll need to connect your Salesforce account! Under forms, go to the “Salesforce” tab. Name your account, choose which environment you want to use, and then the type of Integration Method (API or Web-to-Lead if API is not enabled). Then, connect to your Salesforce org by signing in under Salesforce Access.
Step 2: Create a feed for your form.
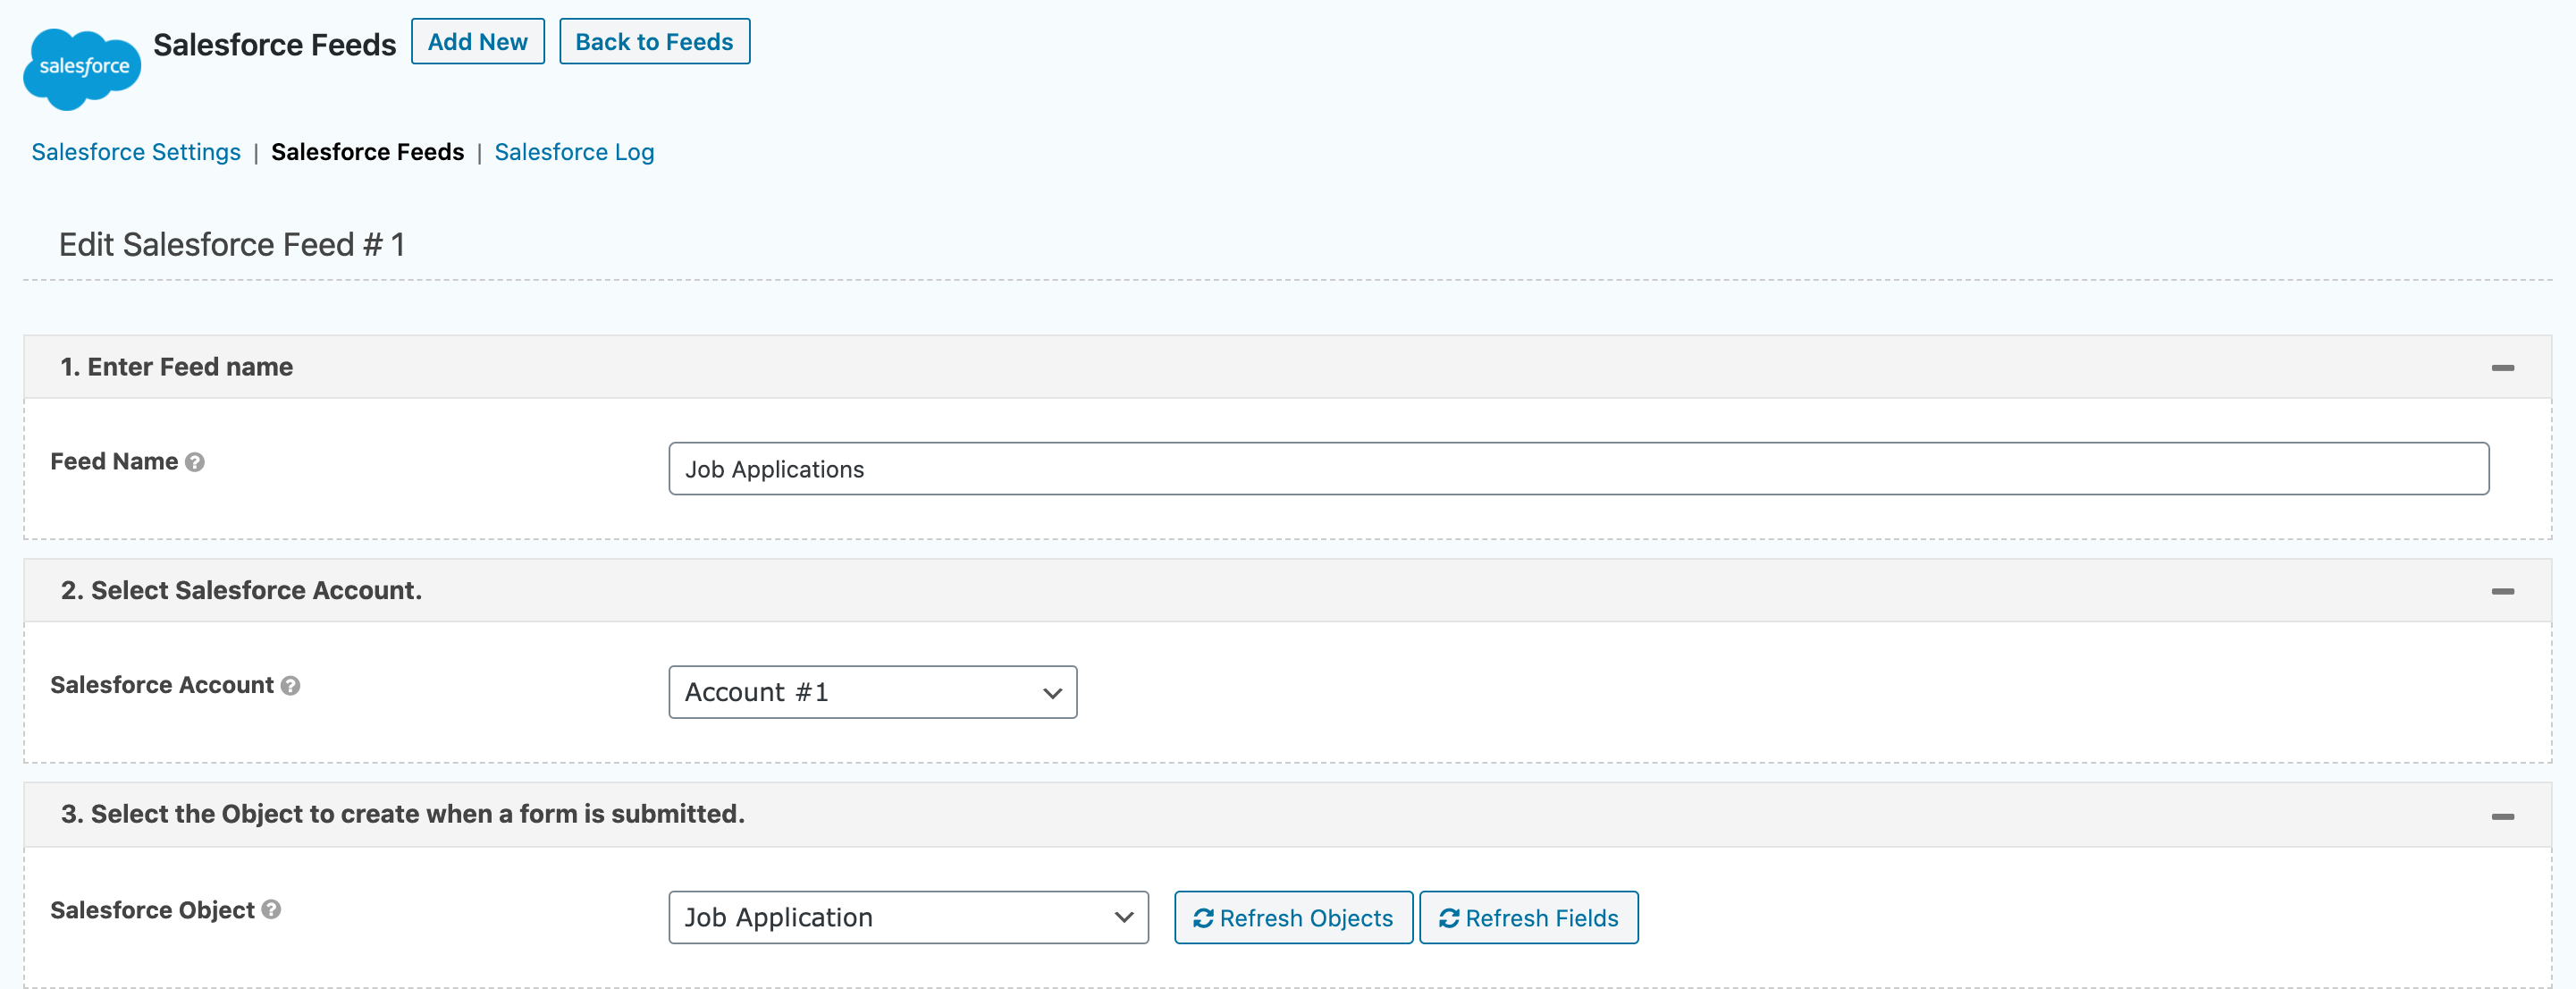
Go to the settings of the form you’ve created, and then choose “Salesforce.” Hit “Add New” to create a new feed. We’ve already created a feed for job applications.
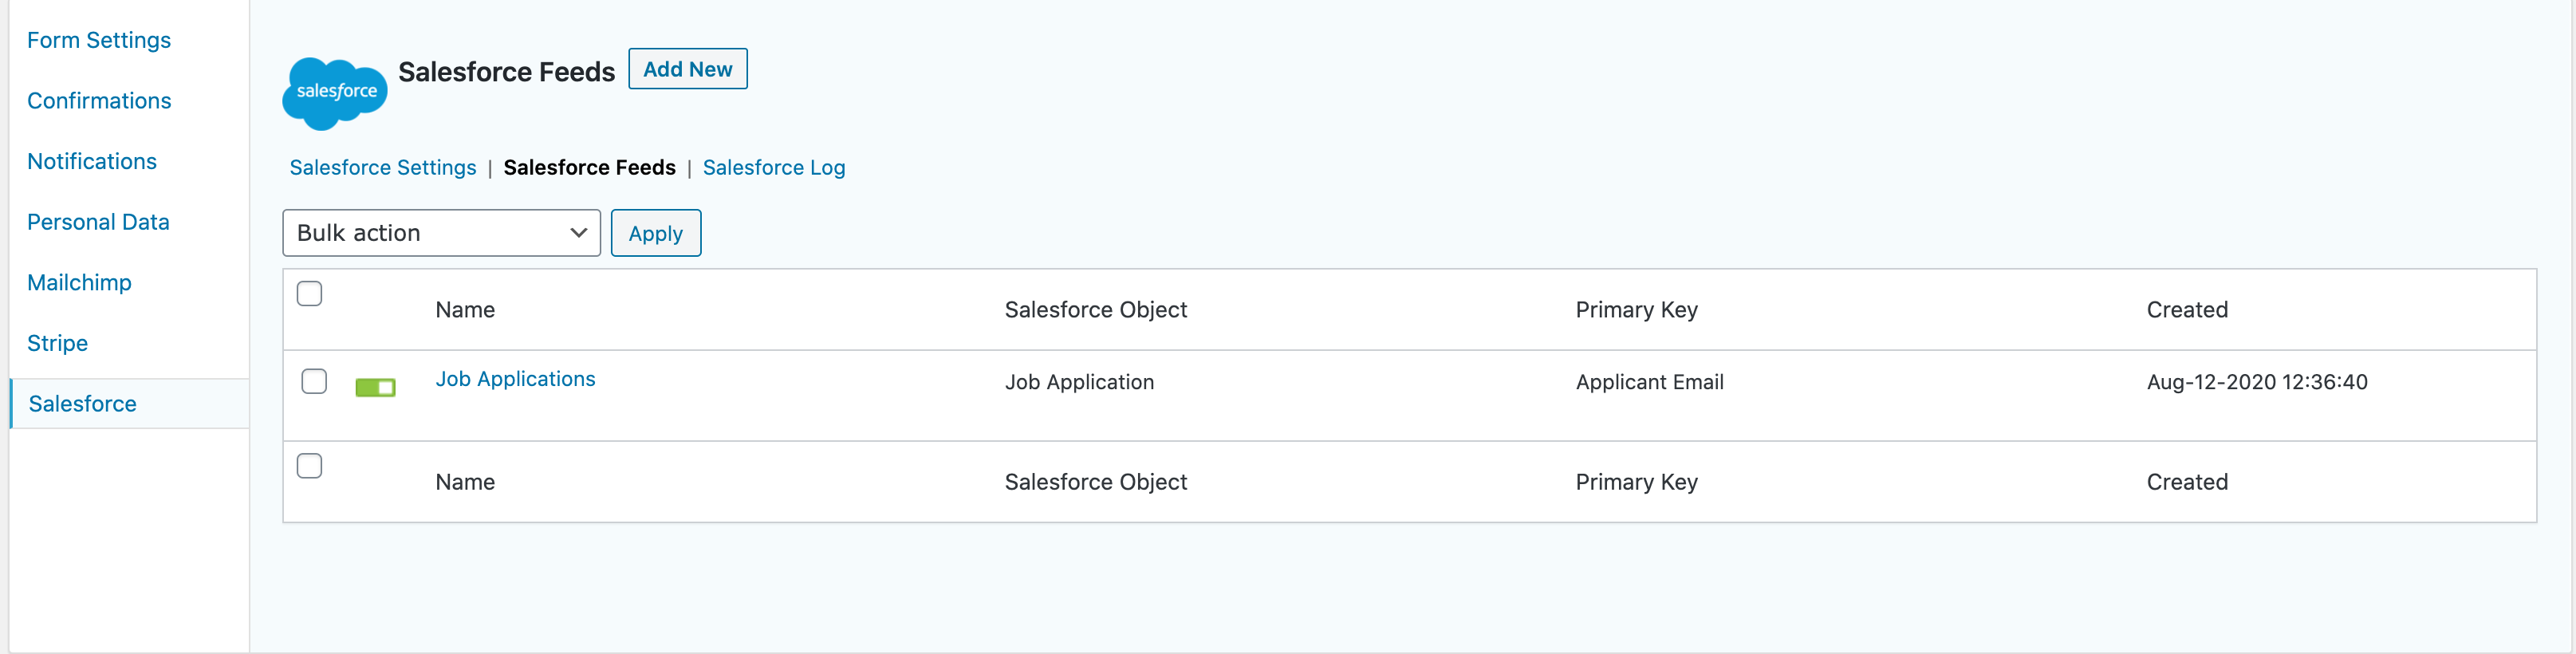
Within the feed, you’ll choose which Salesforce Object you want to connect to your form. For us, we’ve chosen the “Job Application” Object we’ve already created in Salesforce. You’ll need to have fields created in Salesforce that you’ll match up with your form fields.
Step 3: Map your fields
Any required fields will automatically show up for you to map. Majority of the time the field type will be “Standard Field.” You’ll select the form field that will match up with the Salesforce field. For us, we will be mapping the “Email” field to “Applicant_Email.” Pretty easy.

Once you’ve mapped all your required fields, you can add any additional fields that you want mapped over. Choose which field you want to map using the drop down field, and then hit the “add field” button.
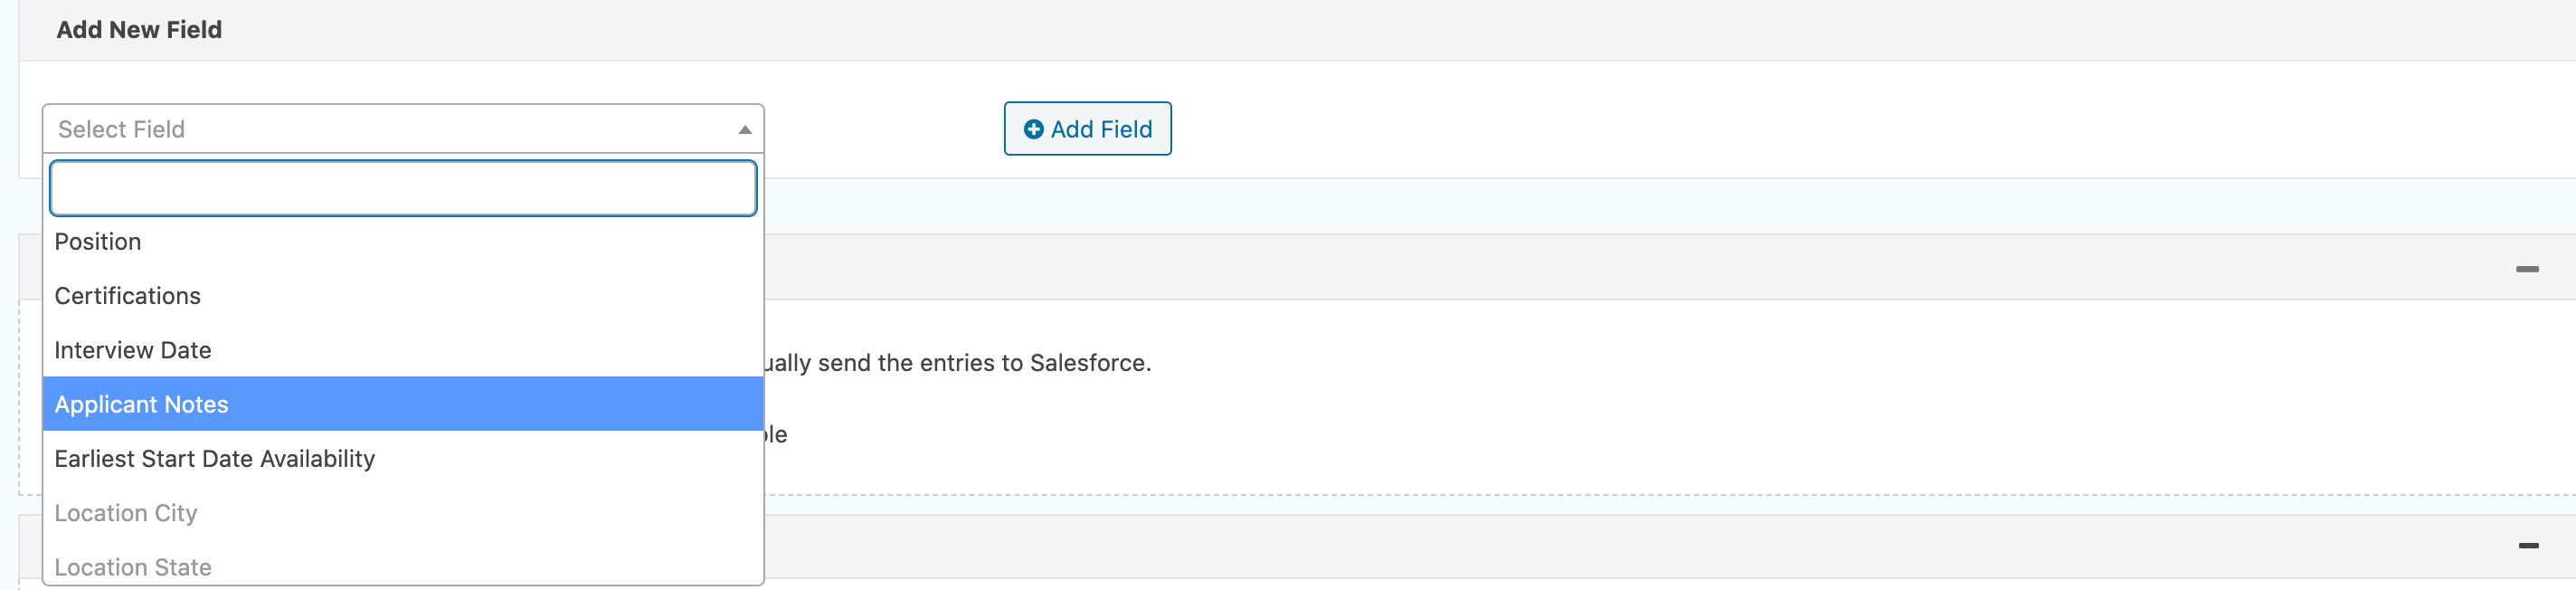
Now it will give you the option to select which form field you want to map to that Salesforce field. Here we are mapping “Links to Writing Samples or Portfolios” on the form to the Applicant_Notes field in Salesforce.

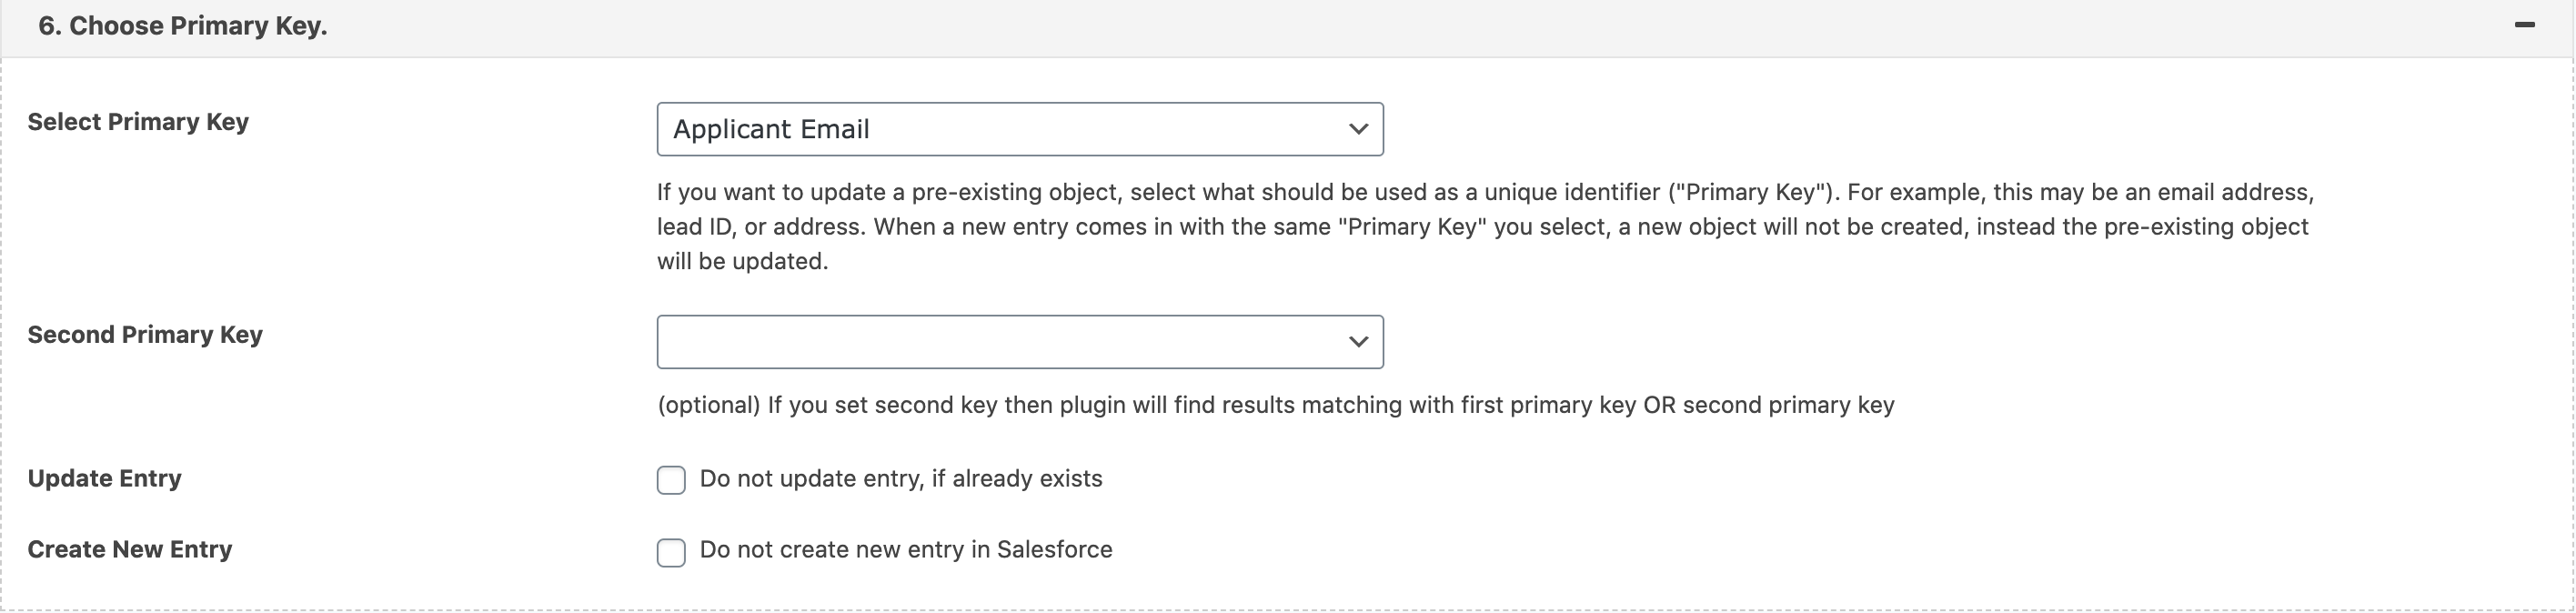
Step 4: Set a Primary Key
Once you have all your fields set up, you need to choose a primary key which will be used if you update a pre-existing object. We used “email,” but you could also use lead ID, or an address. Something specific and unique. You can also set a Second Primary Key.
Step 5: Save Feed!
Step 6: Test your form
Now that you have your feed setup, it’s time to do a test to make sure all the fields map through correctly! Fill out your form, and then head over to your Salesforce org to see if the lead went through. We filled out a test job application – and it went through!
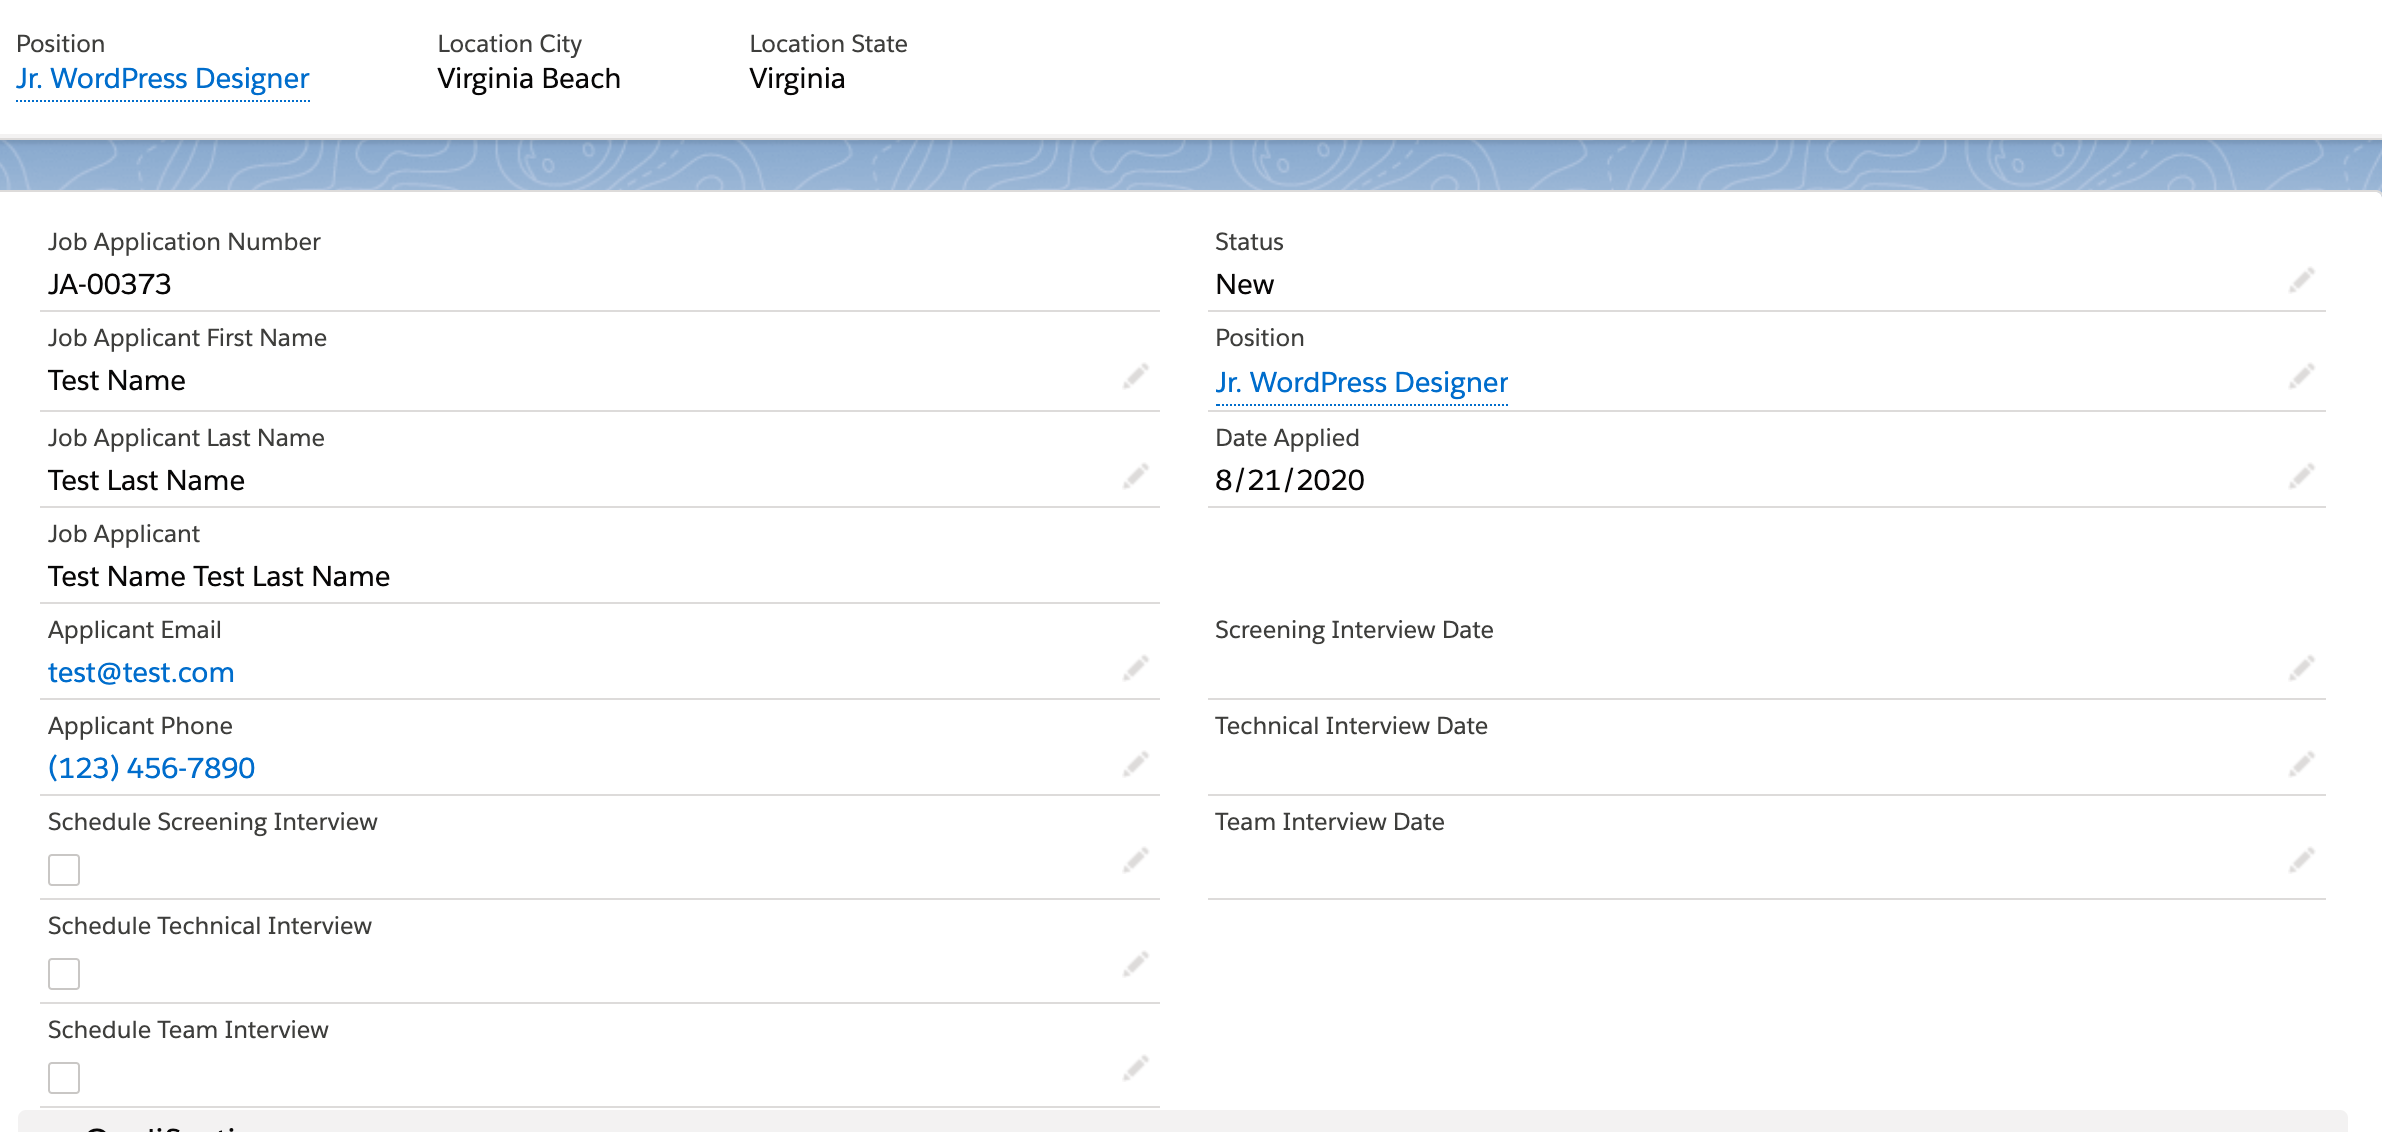
Congratulations – You’ve configured your first feed!

Having trouble with Gravity Forms, Salesforce, or both? We can help!